Data from flat or fixed-width files can be imported into Ursa Studio using the Import object type. This object type enables users to select a file from a bucket or storage container, specify the file’s delimiter, and import the file into a database table.
1. From the Object Workshop home screen, click the plus sign icon.

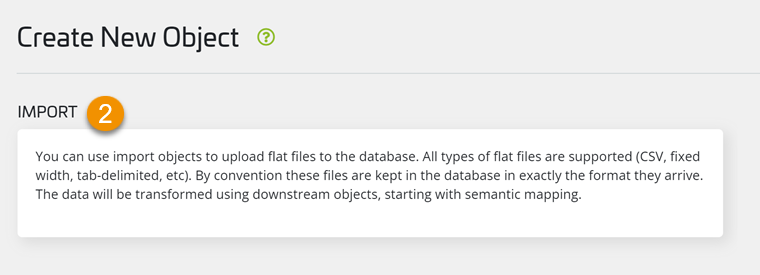
2. In the Create New Object screen, select the Import tile.

3. In the Naming panel, update the following fields:
Object Namespace: Select the namespace associated with the file to be imported. The import object’s namespace typically contains a description of the data’s source, e.g., CMS, Humana; etc.
Object Name: Enter the object’s name. The object name is how the object will be referenced throughout Ursa Studio. The convention used by the Ursa Health team for naming import objects has three parts, [“Source”]+[Namespace]+[File Description]. First, the word “Source” is used to indicate the object is associated with the Source Data layer of the data model. Second, the object’s namespace is included. Third, a brief description of the file is included. “Source ACMEHEALTH-CMS Membership” is an example of how most import objects are named.
Object Description: Enter a description of import file. The convention used by the Ursa Health team is to describe the grainsize of the file being imported in this field, e.g., “One row per member.”
Table Name: Enter a table name for the import object. The Ursa Health team uses a convention for table names similar to the one used for object names. However, for table names this convention potentially has four parts, [“sd”]+[namespace]+[file description]+[#]. First, the token “sd” is used to indicate the object is associated with the Source Data layer of the data model. Second, the object’s namespace is included. Third, a brief description of the file is included. Forth, if the object represents one file in a series of files being imported, a number is appended. “sd_acmehealth_cms_membership” is an example of the structure used to name most import object tables.
Tags: Select or enter any tags that should be associated with the object. Tags are general purpose labels that can be applied to a variety of data assets in Ursa Studio for identification and categorization.

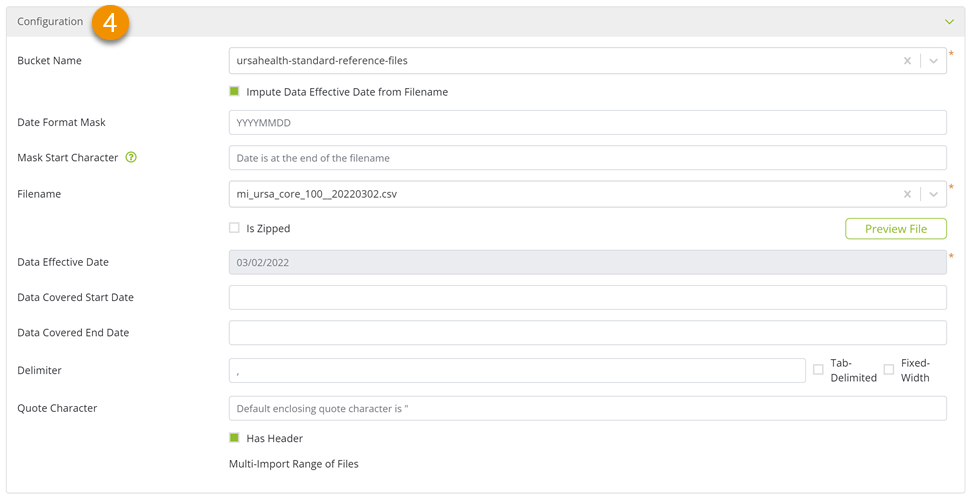
4. In the Configuration panel, take the following actions:
Bucket Name or Storage Container Name: Select the file’s bucket or storage container form this dropdown.
Impute Data Effective Date from Filename: If selected, the file's data effective date, a required parameter for every file imported, will be automatically imputed from the filename. The following two parameters are for specifying the details of the data effective date's format and location in the filename. Note this option is only available for cloud-based deployments.
Date Format Mask: Enter the date format mask of the data effective date to be imputed from import file's name. The mask can consist of the characters Y, M, D, period, underscore, and hyphen. By default, the date format mask is assumed to be YYYYMMDD. When the file's date format mask is YYYYMMDD, this field can be left blank.
Mask Start Character: Enter the (1-indexed) start character of the date string. By default, the date is assumed to be at the end of the filename. When the date is at the end of the filename, this field can be left blank.
Filename: Select the appropriate file from this dropdown. If the Impute Data Effective Date from Filename option is selected, a generic, masked filename can be chosen as the file to be imported. By selecting the "Latest file matching [file_name_mask]" option, the file to be imported will be dynamically determined at the time of import.
Is Zipped: Select this option if the file to be imported is contained in a zip or gzip file. When this option is selected, an optional field for entering the zipped file’s password is displayed.
Date Effective Date: Select the date the data was made available for use, e.g., if a monthly membership file for October was made available on November 5th, the data effective date would be November 5th. If this value is left blank, the date of the import will be considered the data effective date.
Data Covered Start Date: Select the date representing the beginning of the period covered by the file being imported, e.g., using the previous example of a monthly membership file for October, the data covered start date would be October 1st.
Data Covered End Date: Select the date representing the end of the period time covered by the file being imported, e.g., continuing with the previous example of a monthly membership file for October, the data covered end date would be October 31st.
Delimiter: Enter the delimiter used by the file being imported. Ursa Studio assumes a csv file is being imported, and if this is true, nothing needs to be entered in this field.
Tab-Delimited: Select this checkbox if a tab delimited file is being imported.
Fixed-Width: Select this checkbox if a fixed-width file is being imported. When importing a fixed-width file, you will be prompted to import a two or three column data dictionary for the file.
Quote Character: Enter the quote character used by the file being imported. Ursa Studio assumes a csv file is being imported, and if this is true, nothing needs to be entered in this field.
Has Header: Select this checkbox if the file being imported has column headers in the first row of the file.

5. In the Object Metadata panel, take the following actions:
Source: Select the option that represents the file’s source, e.g., if the file was provided by Humana this source might be “Humana”. To add a new source option, select the “Manage Sources” button and add a new source in Integration Manager.
Is Visible to Layers: This option enables users to define the data model layers that will be able to view and access the import object. By default, the “Use Layer Default” option is checked, which is the sensible choice. Unless, a file is being imported for an unusual purpose, leave this option as is.

6. Finally, to import the file, scroll up and select the upload file icon in the upper right corner of the screen. When selected, the screen is redirected back to the Object Workshop home screen and the new object will be running in the ELT Progress blade.

For more information on Import Objects, please see the Ursa Studio Product Manual.