In compliance with HIPAA requirements, Ursa Health’s security best-practices advise that a high standard of security be met in regards to the transfer of information between parties. Information transfer must be protected by strong cryptography, a clear chain of custody, traceability, and strict levels of access control.
At Ursa Health, our preferred means to achieve these requirements for flat file transfer in Azure is to have flat files sent directly into dedicated Azure Blob Storage Containers. The Ursa Health application is programmed to import data directly from these storage containers into the database, minimizing the exposure of sensitive data.
Azure Blob Storage Containers are always strongly encrypted, and we always use a dedicated container for each customer or third party.
These data are assumed to contain PHI and will be treated as Highly Sensitive, per Ursa Health policies and procedures. In this case, the data do not require a classification label. If the data are not of this nature, please label with your entity’s classification and provide a means of interpreting the label.
Manual Access of Storage Container
The Azure Storage Explorer desktop application is available as a free download via https://azure.microsoft.com/en-us/features/storage-explorer/
Select your operating system to install it on your computer. Then, to transfer files, use the following steps:
• Open the downloaded Azure Storage Explorer application
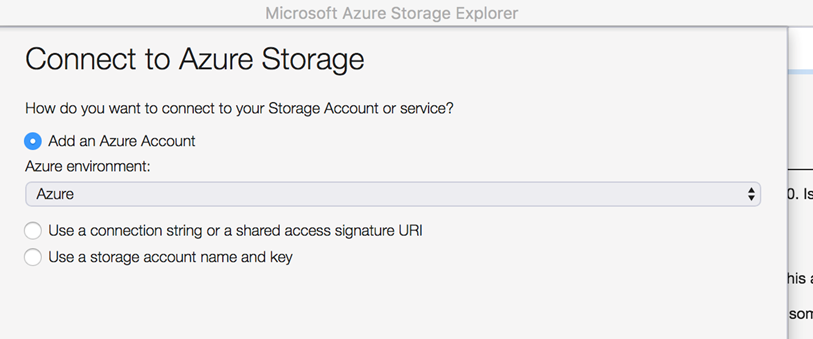
• The application will automatically present a pop-up window, or you should click on the power-plug “Add Account” icon in the left navigation bar
• Select ‘Use a Connection String, or Shared Access Signature URI and click ‘Next’
• In the next screen, select ‘Use a SAS URI’ and paste in the Shared Access Signature URI that you have received from Ursa Health.
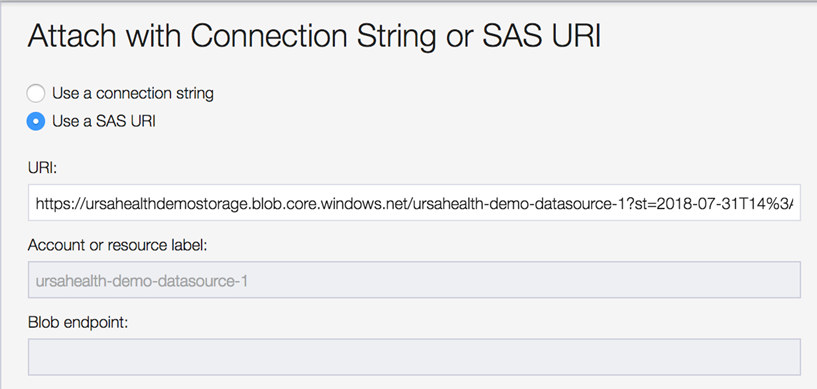
• You do not need to complete any of the other fields on this screen. Click ‘Next’
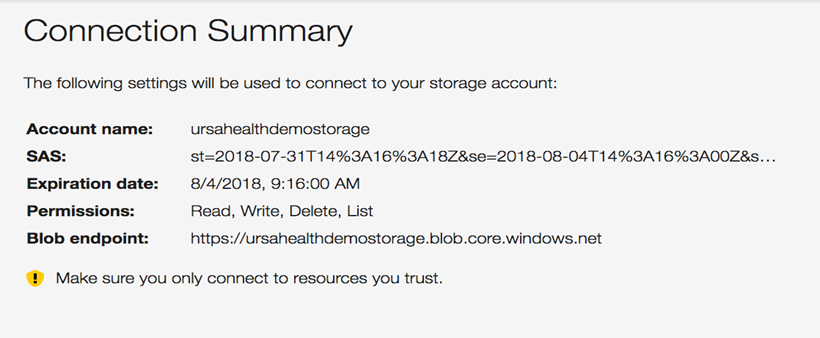
• You should be connected now and see this screen (though with a different Account name). Click ‘Connect’:
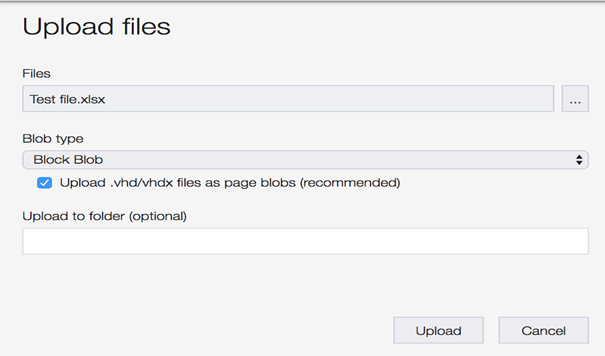
• At the top of the next screen, select the ‘Upload’ button and choose whether you’ll be loading in a File or a Folder.
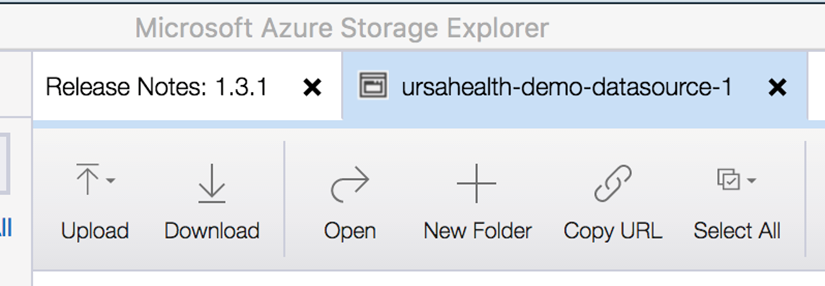
• Search for the File you will be uploading; you do not need to change the ‘Blob Type’ settings; if applicable, select the Folder into which the file is loading; and click ‘Upload’
• If the upload or download fails due to performance reasons, you can try using the “Use AZcopy for improved upload and download” in the Preview menu bar for increased performance.
When we send you the URL key you will be tempted to click on it to open it in a web browser. This will not do you any good! Even though it looks like a web address it should be treated as a key for authentication in the Azure Storage Explorer.
Programmatic Access of Storage Container
For long-standing engagements it is frequently preferable to automate the transfer and ingestion of these files. Microsoft provides SDKs in several programming languages to automate interaction with their storage containers. Upload files as Blob objects is a common use-case, and we can provide a Python or NodeJS script that should kickstart your efforts to automate this process.
Once the flat files have been uploaded, users will frequently want to immediately kick off an ELT process to re-integrate the new data and re-create all the downstream reports. Such a process can be set up as a saved ELT in the Ursa Studio. Each saved ELT publishes a unique HTTP endpoint to kick off a rebuild.
The process that generates and uploads the flat files can send an HTTP POST request to the relevant endpoint to trigger the ELT. The URL and body of the HTTP POST request can be found in the ELT Trigger Endpoint tab of the Integration Manager zone.